Welcome to Shawnee State University! As a Shawnee State student, you will have access to several tools that require a username and password. On this webpage, we will walk you through the process of activating both of your accounts you will need to use these tools.
![]()
A NOTE TO PARENTS:
Please DO NOT complete these steps for your student!
It is very important that the each Student personally complete the account set up themselves. The set-up process will take a few minutes, so for the best results please:
- Take a moment and complete this in a place where you can focus on what you are doing.
- Read and follow the directions for each step carefully
- Use both a computer or laptop AND your cellphone.
- Do the primary account setup steps on a computer or laptop – NOT a cellphone.
- Use your cell phone for the Microsoft Authenticator setup portion only.
- Create a password you can easily remember.
If you have any questions while activating your accounts, please contact ITS by completing an IT Support Form and a member of our team will contact you to provide assistance.
To activate your account you will need:
- Your SSU ID Number (can be found on most information you have received from SSU)
- A computer or laptop
- Your cell phone
If you do not know your Student ID Number, please contact the Admissions Office at (740) 351-4778 or email admissions@shawnee.edu to inquire about your Student ID Number.
1. @MyMail Email – Microsoft 365 Account
The first account you need to set up is your Microsoft 365 Account. We also refer to this as your Shawnee @MyMail Email Account.
SSU provides you with a Microsoft 365 account. We refer to this account as your @MyMail Email Account. Microsoft 365 is a cloud service that provides you with a Shawnee State University Email Address (username@MyMail.shawnee.edu) and grants you access to all of the applications in the Microsoft 365 suite at no out of pocket cost to you as a student.
The Microsoft 365 suite includes all of the Microsoft Office tools, including:
- Word
- PowerPoint
- Excel
- OneDrive Storage
The Microsoft 365 apps can also be downloaded and installed on your personal devices at no extra cost to provide you all of the tools you need to be a successful student.
This account provides access to many things, including:
- Microsoft 365 (Email and the Office Suite)
- MySSU
- Blackboard
- The Shawnee App
- Electronic Library Resources
My Username and Initial Password
- @MyMail Username: Your last name followed by first name initial (with a number if needed) followed by @mymail.Shawnee.edu. You received this information from admissions at the time you were accepted.
- Initial Password: Your initial password is your first name initial (Uppercase) + your last name initial (Uppercase) + your Student ID Number + @ssu (Lowercase)
Example:
Name: Shawn E. Bear
Username: bears2@mymail.shawnee.edu
Password: SB123456@ssu
Setup your @MyMail.shawnee.edu Microsoft 365 Account Now
Using the Username and Initial Password provided above, you can now set up your @MyMail.shawnee.edu Microsoft 365 Account.
Before we begin, it is important you understand that you have two separate but similar accounts: your @MyMail Account and your Network Account. They are both Microsoft accounts, BUT they are used for different purposes on campus. The usernames are similar but they are not the same account so please pay close attention.
Directions:
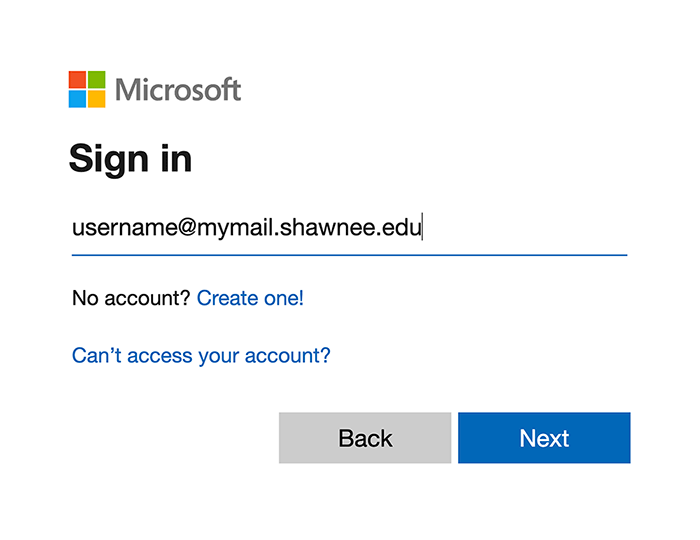
- Visit the website office.com
- Enter your Username into the Microsoft Sign in box.
@MyMail Username: Your last name followed by first name initial (with a number if needed) followed by @mymail.Shawnee.edu. You received this information from admissions at the time you were accepted.
Then click NEXT.
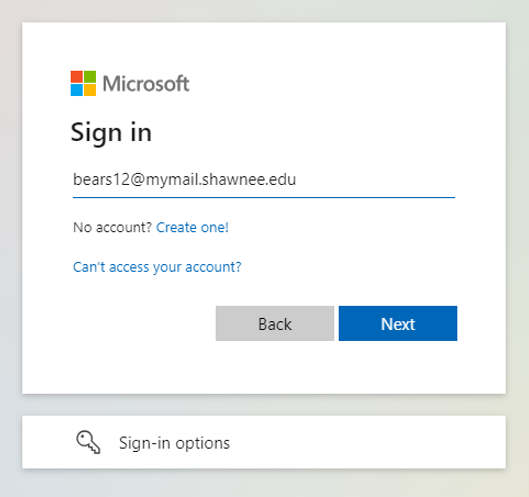
- Enter your Initial Password into the Microsoft Sign in Box.
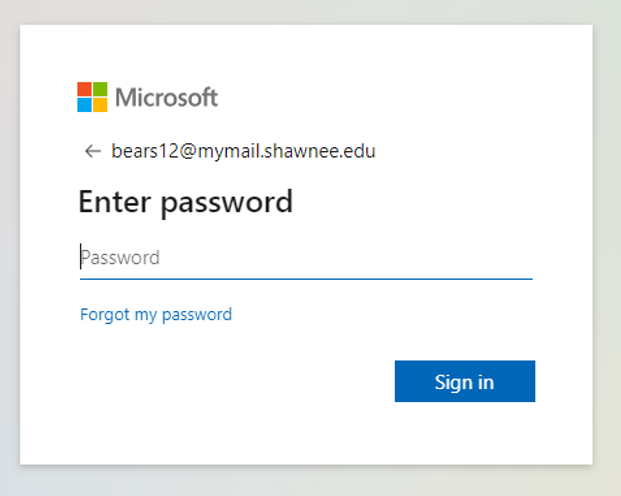
Initial Password: Your initial password is your first name initial (Uppercase) + your last name initial (Uppercase) + your Student ID Number + @ssu (Lowercase)
Then Click SIGN IN. - You will then see a box telling you that “More Information is required.”
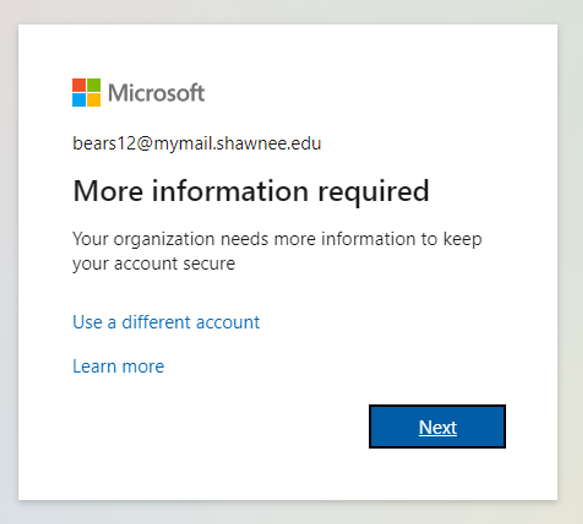
Simply click NEXT to proceed to the next screen.
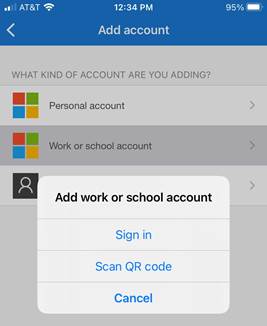
- You will need to download the Microsoft Authenticator App on to your phone.
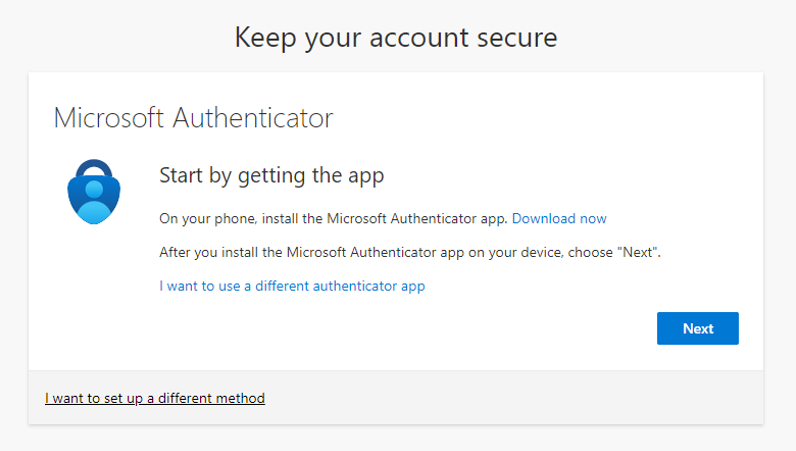
Scan the QR Code shown here to conveniently download the App.
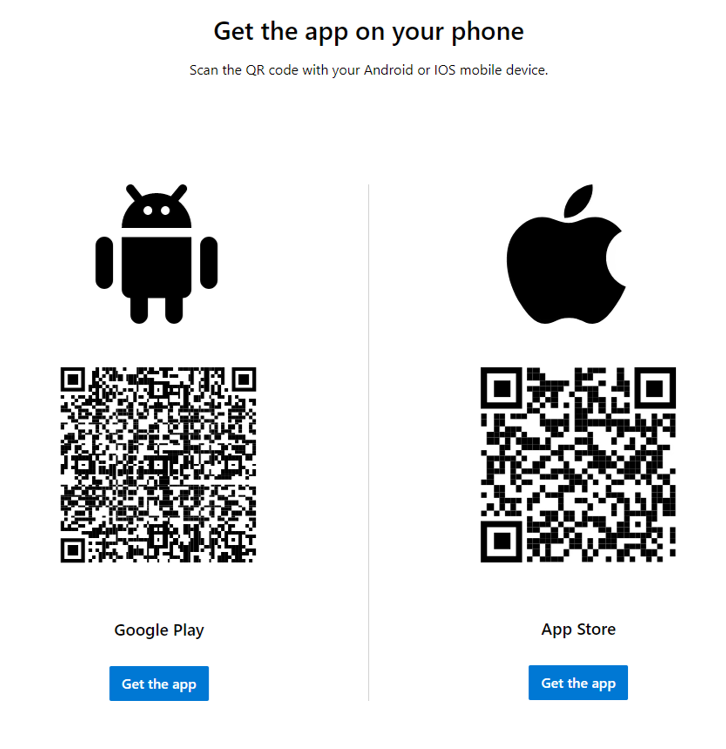
After you have the App on your phone, Click NEXT.
- Follow the directions on the login screen and your phone to setup the Authenticator App.
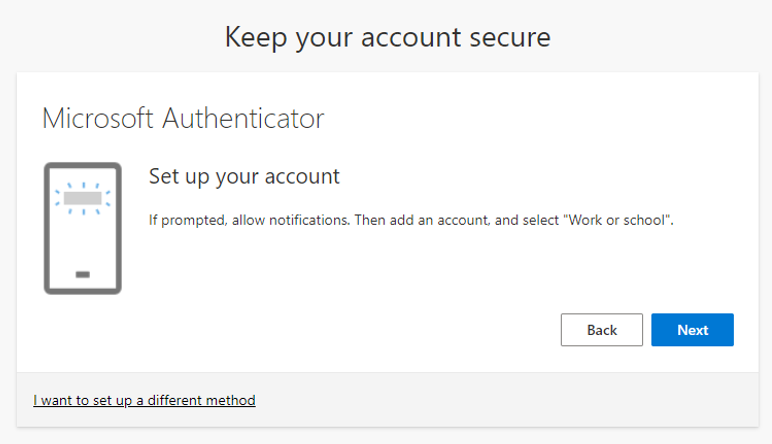
When finished, click NEXT.
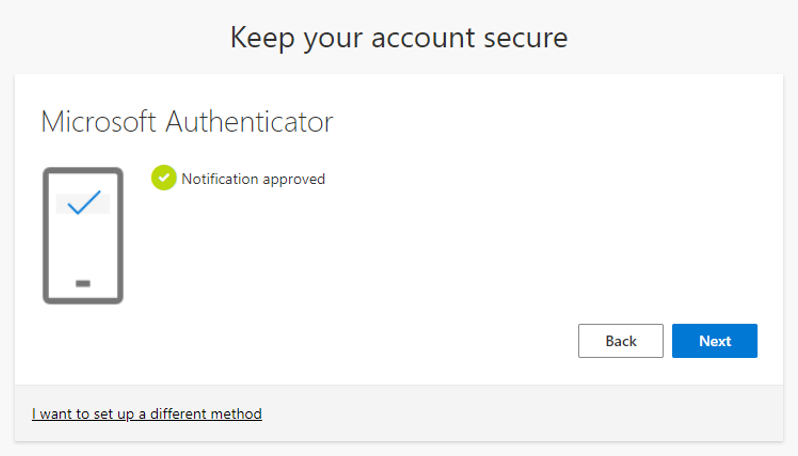
- Once the Authenticator App is setup on your phone, you will be asked to Authenticate using the APP.
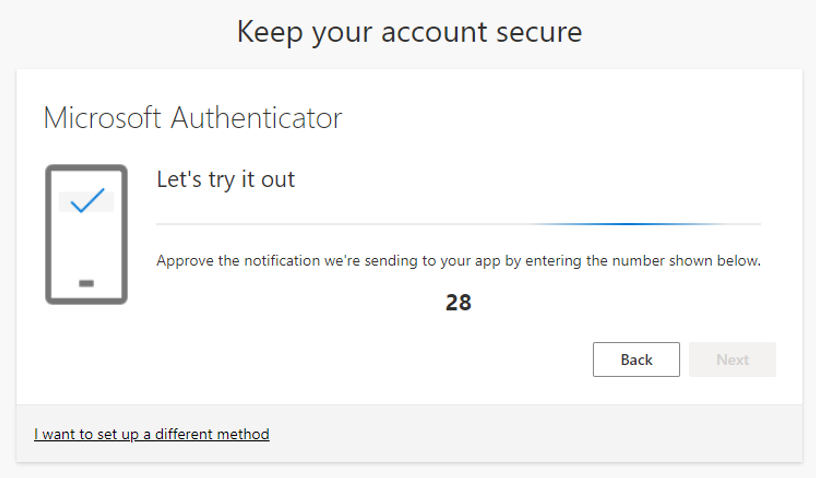
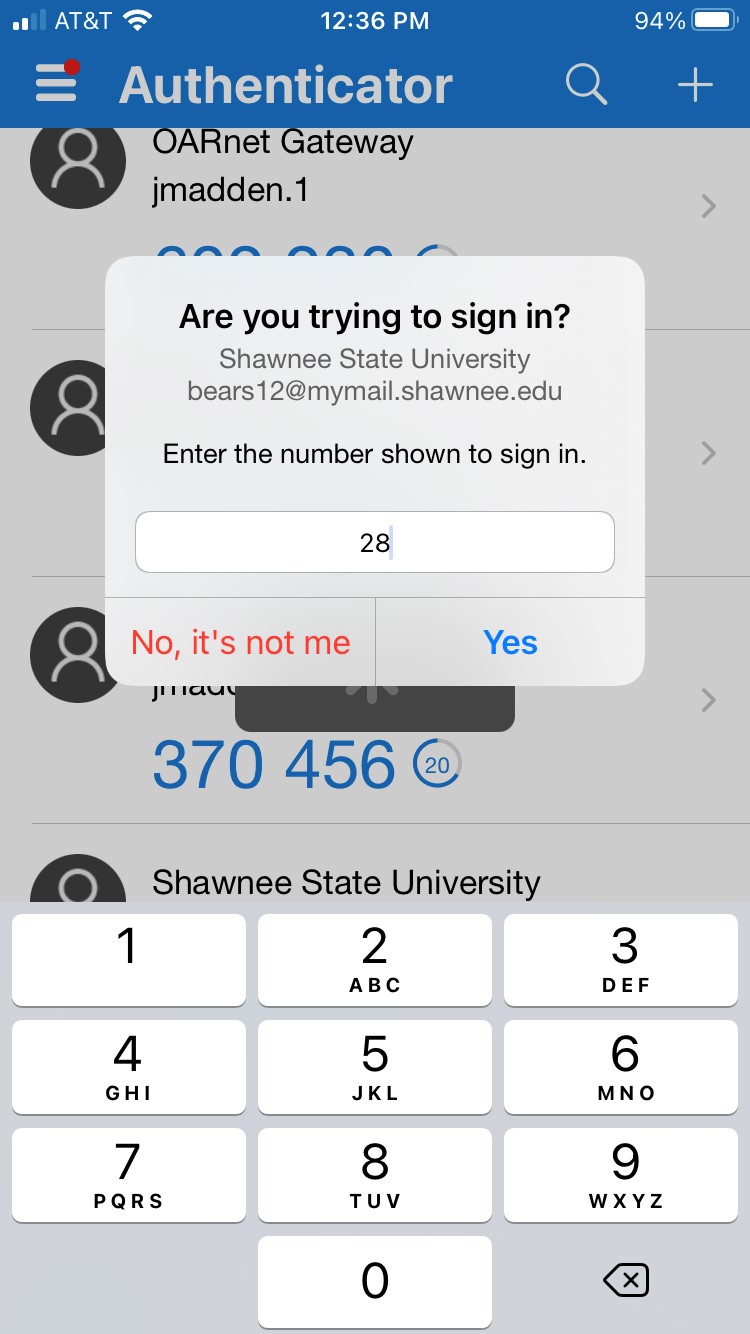
After you Authenticate by entering the provided code, click NEXT.
- Once you have Authenticated, Click DONE to continue to the login process.
- You will now be asked to create a new Password.
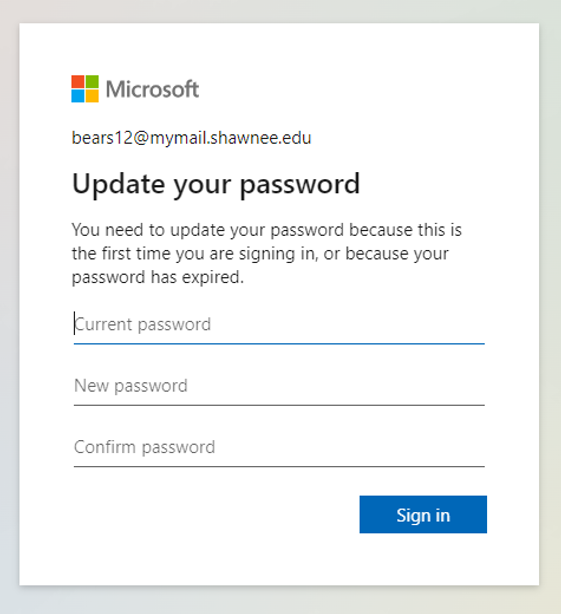
A strong password is required. Strong passwords are 8 to 24 characters and must combine uppercase and lowercase letters, numbers, and symbols. They cannot contain your username.
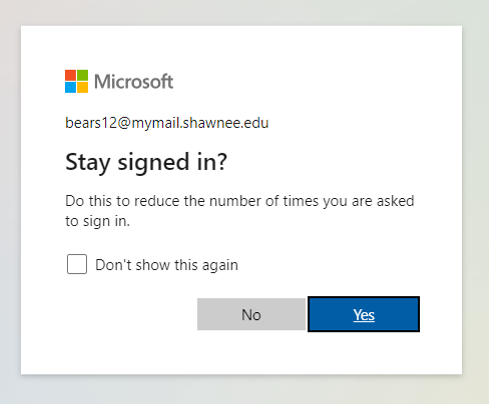
- When asked if you wish to Stay Signed in, answer NO unless this is your personal device.
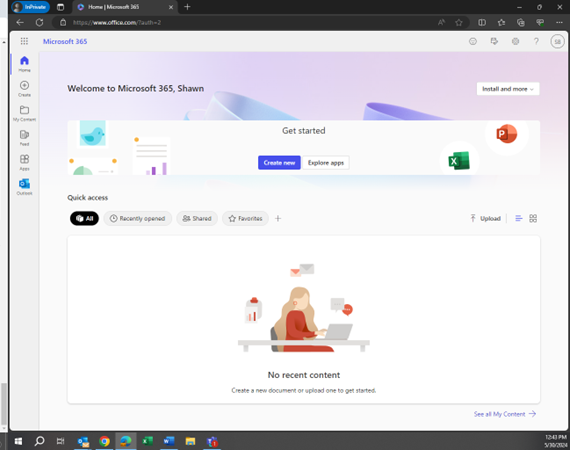
- You will then be in the Microsoft 365 Site where you can access all the apps of the Office Suite. You will also use this login to all of the other tools mentioned before.
2. Shawnee Network Account
All students also have a second account known as your Shawnee Network Account. This account provides access to things you will use only when you are physically on campus.
These resources include:
- Classroom and library computers located physically on campus
- The Shawnee Wi-Fi network when physically on campus
Since you will only use this account when physically on campus, you can wait and activate this account when you are on campus for Orientation, Week of Welcome, or your first week of classes.
Once you are on campus and ready to activate your account and create a password, the easiest way to do this is to use an SSU Networked computer. To locate a networked computer, visit the SSU Library, the Student Success Center, the BearCave, or any open computer lab on campus and use one of these computers to change your password.
My Username and Initial Password
- Network Account Username: Your last name followed by first name initial (with a number if needed) followed by @shawnee.edu. You received this information from admissions at the time you were accepted.
- Initial Password: Your initial password is your first name initial (Uppercase) + your last name initial (Uppercase) + your Student ID Number + @ssu (Lowercase)
Example:
Name: Shawn E. Bear
Username: bears2@shawnee.edu.
Password: SB123456@ssu
Setup your Shawnee Network Account Now
Remember!
You have to set up two separate, but similar, accounts: Your Network Account and your @MyMail Account.
The usernames are similar, because they are both Microsoft Accounts, BUT they are used for different purposes, so please complete all of the setup steps for both accounts.
Directions:
- Sit down at an SSU student use computer in a location such as the Library, Student Success Center, the Bear Cave, or a Computer Lab.
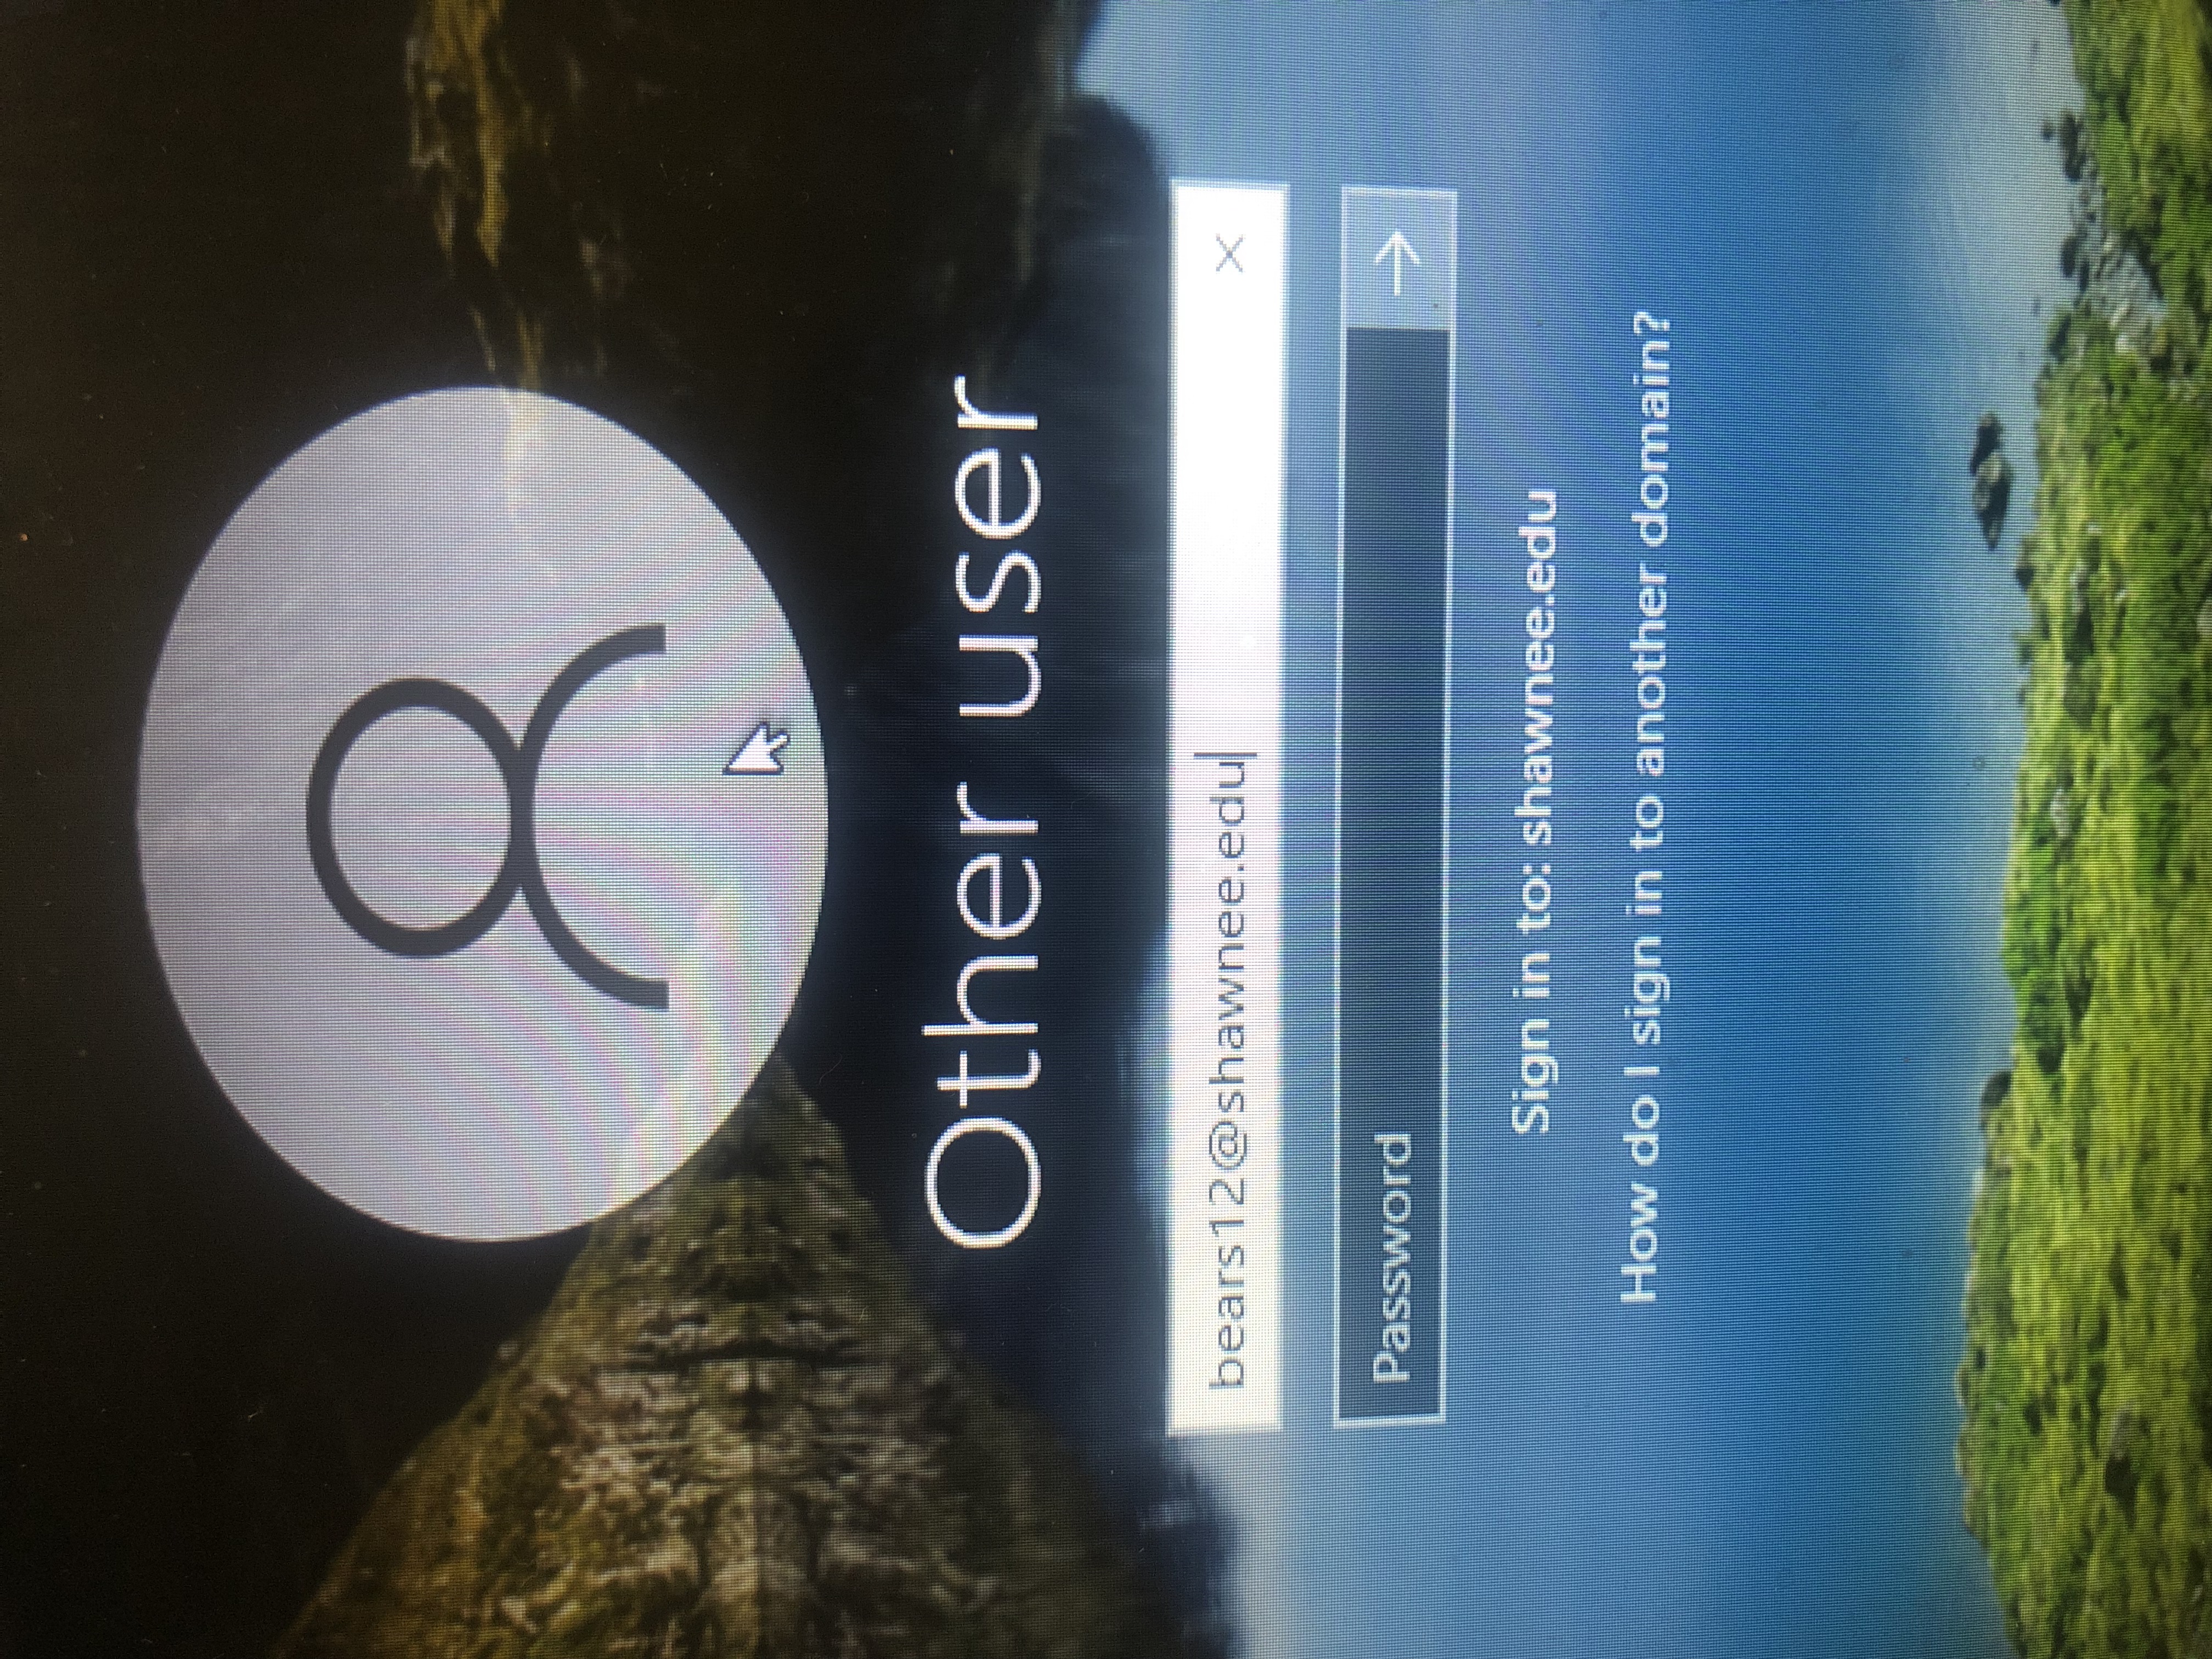
- Enter your Username at the Microsoft Windows Login Prompt
Network Account Username: Your last name followed by first name initial (with a number if needed) followed by @shawnee.edu. You received this information from admissions at the time you were accepted. - Enter your Initial Password into the Windows Login in Box
Initial Password: Your initial password is your first name initial (Uppercase) + your last name initial (Uppercase) + your Student ID Number + @ssu (Lowercase)
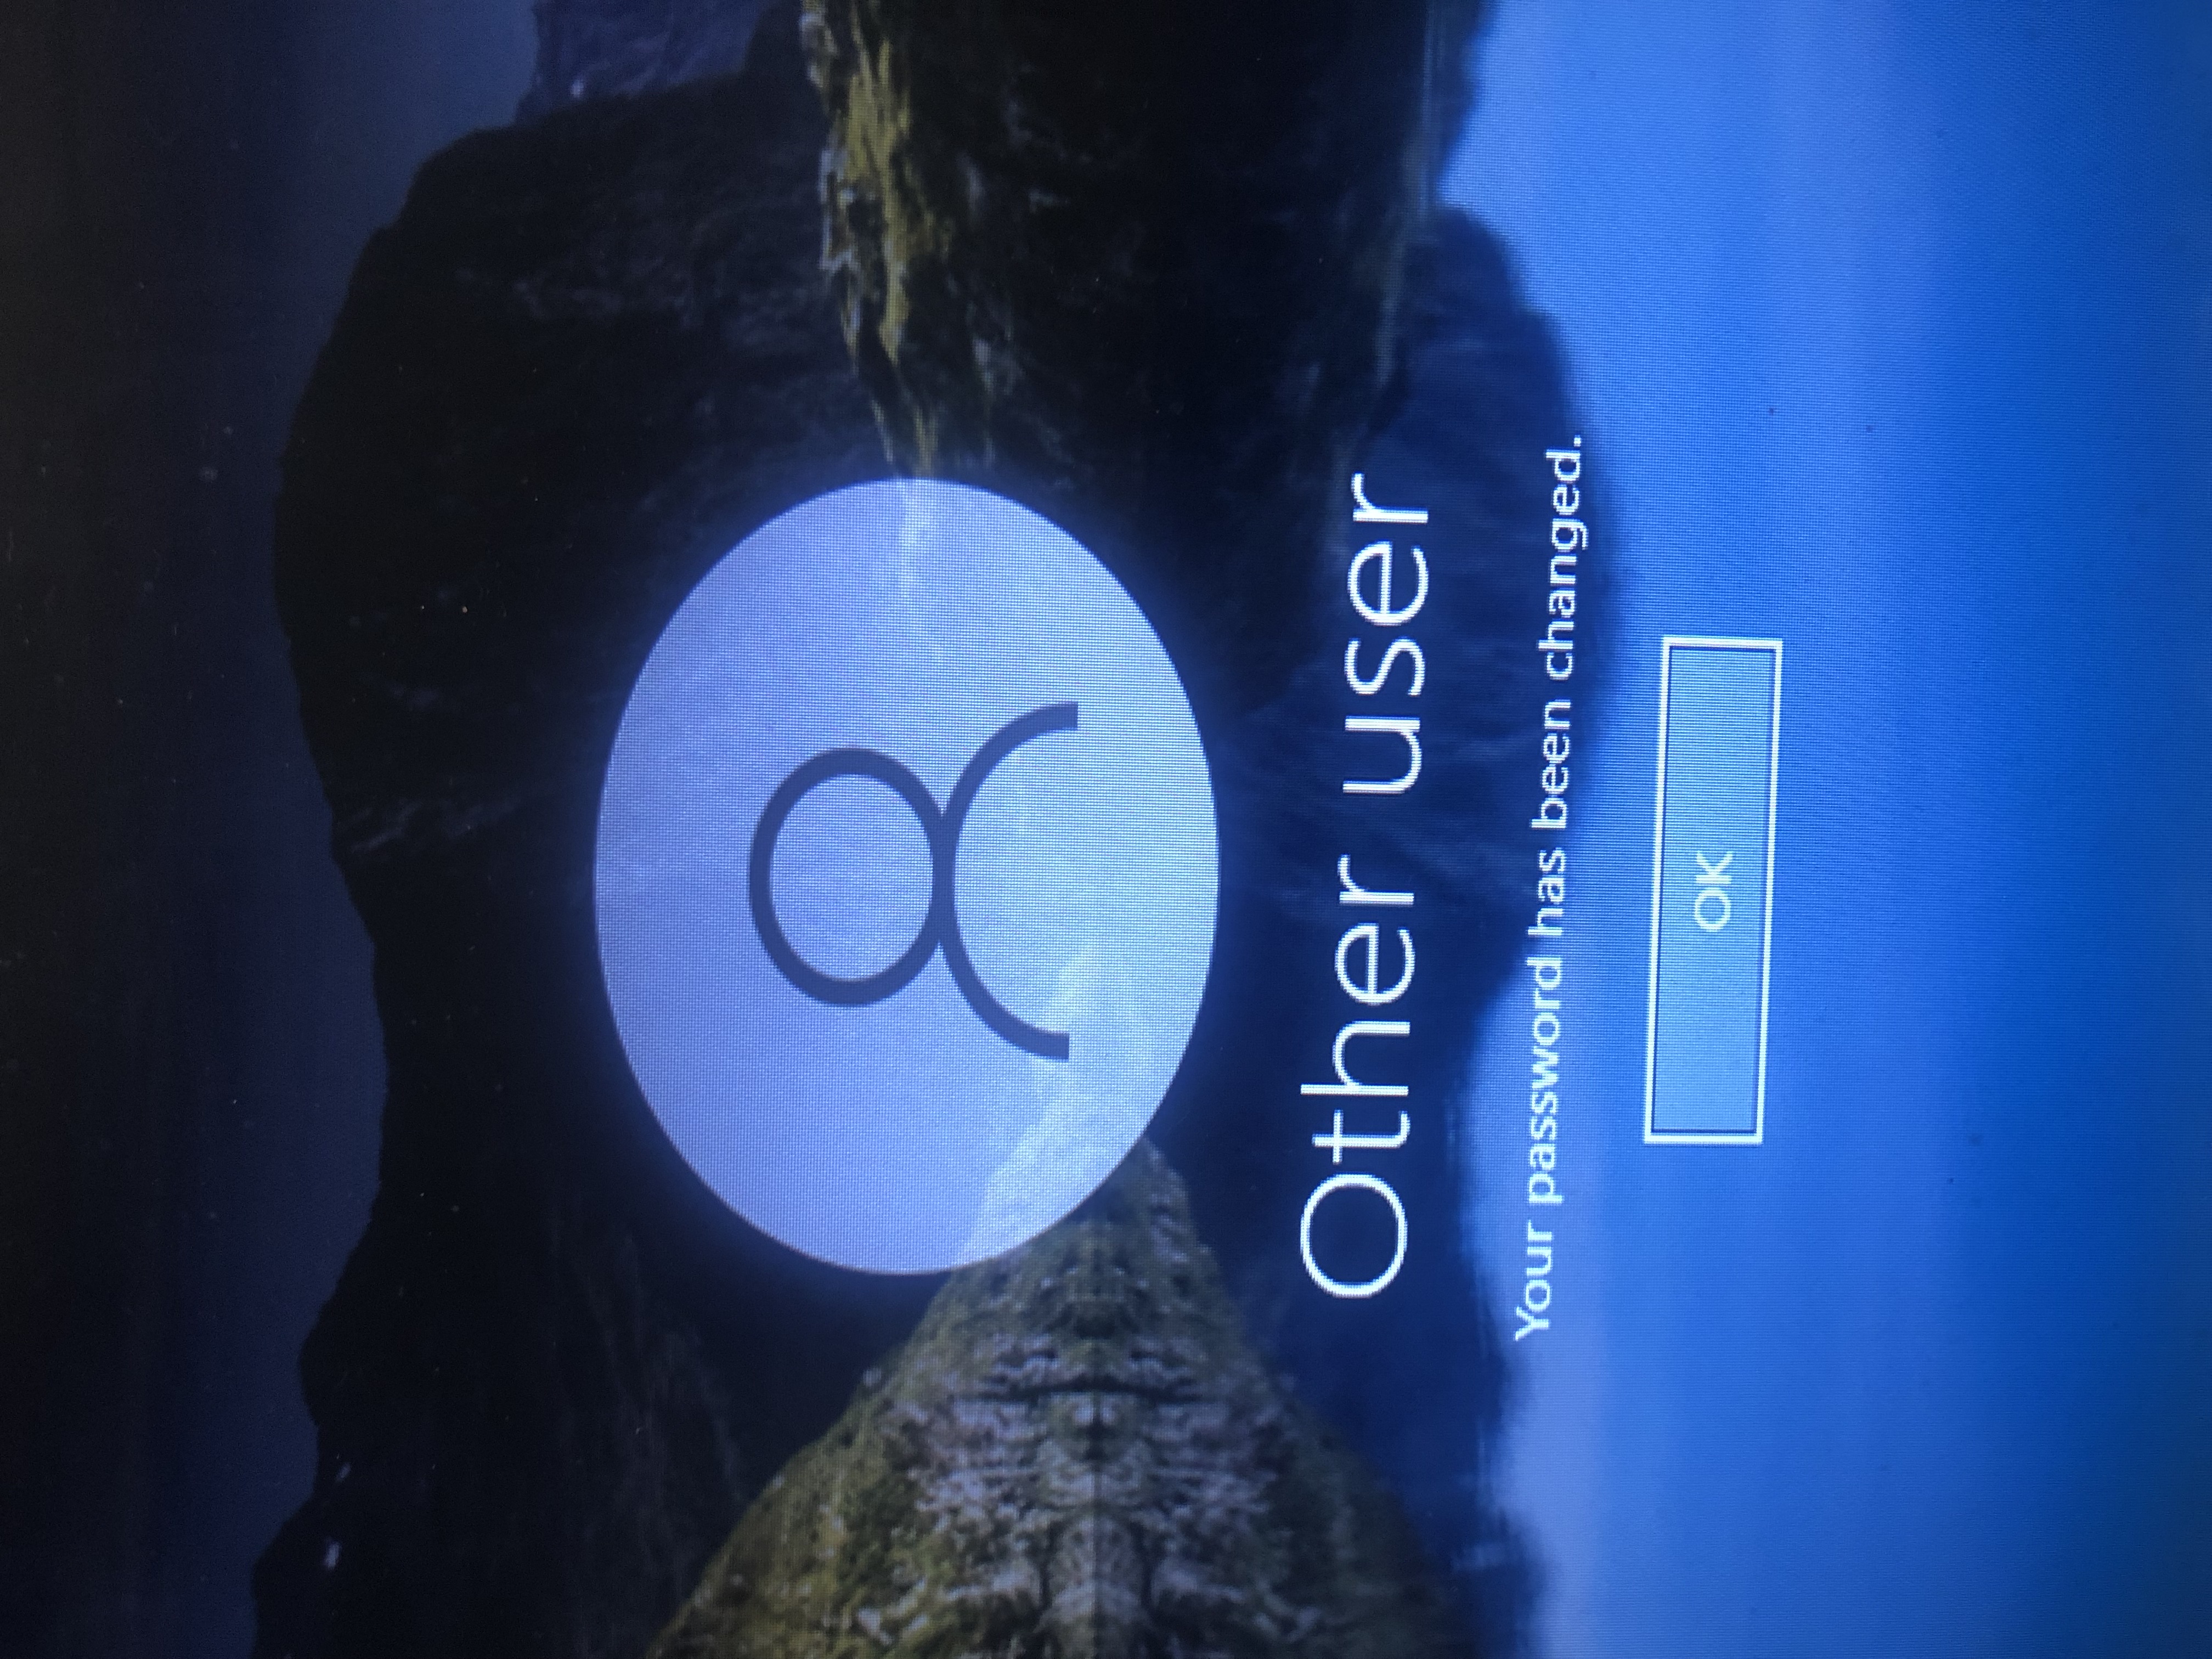
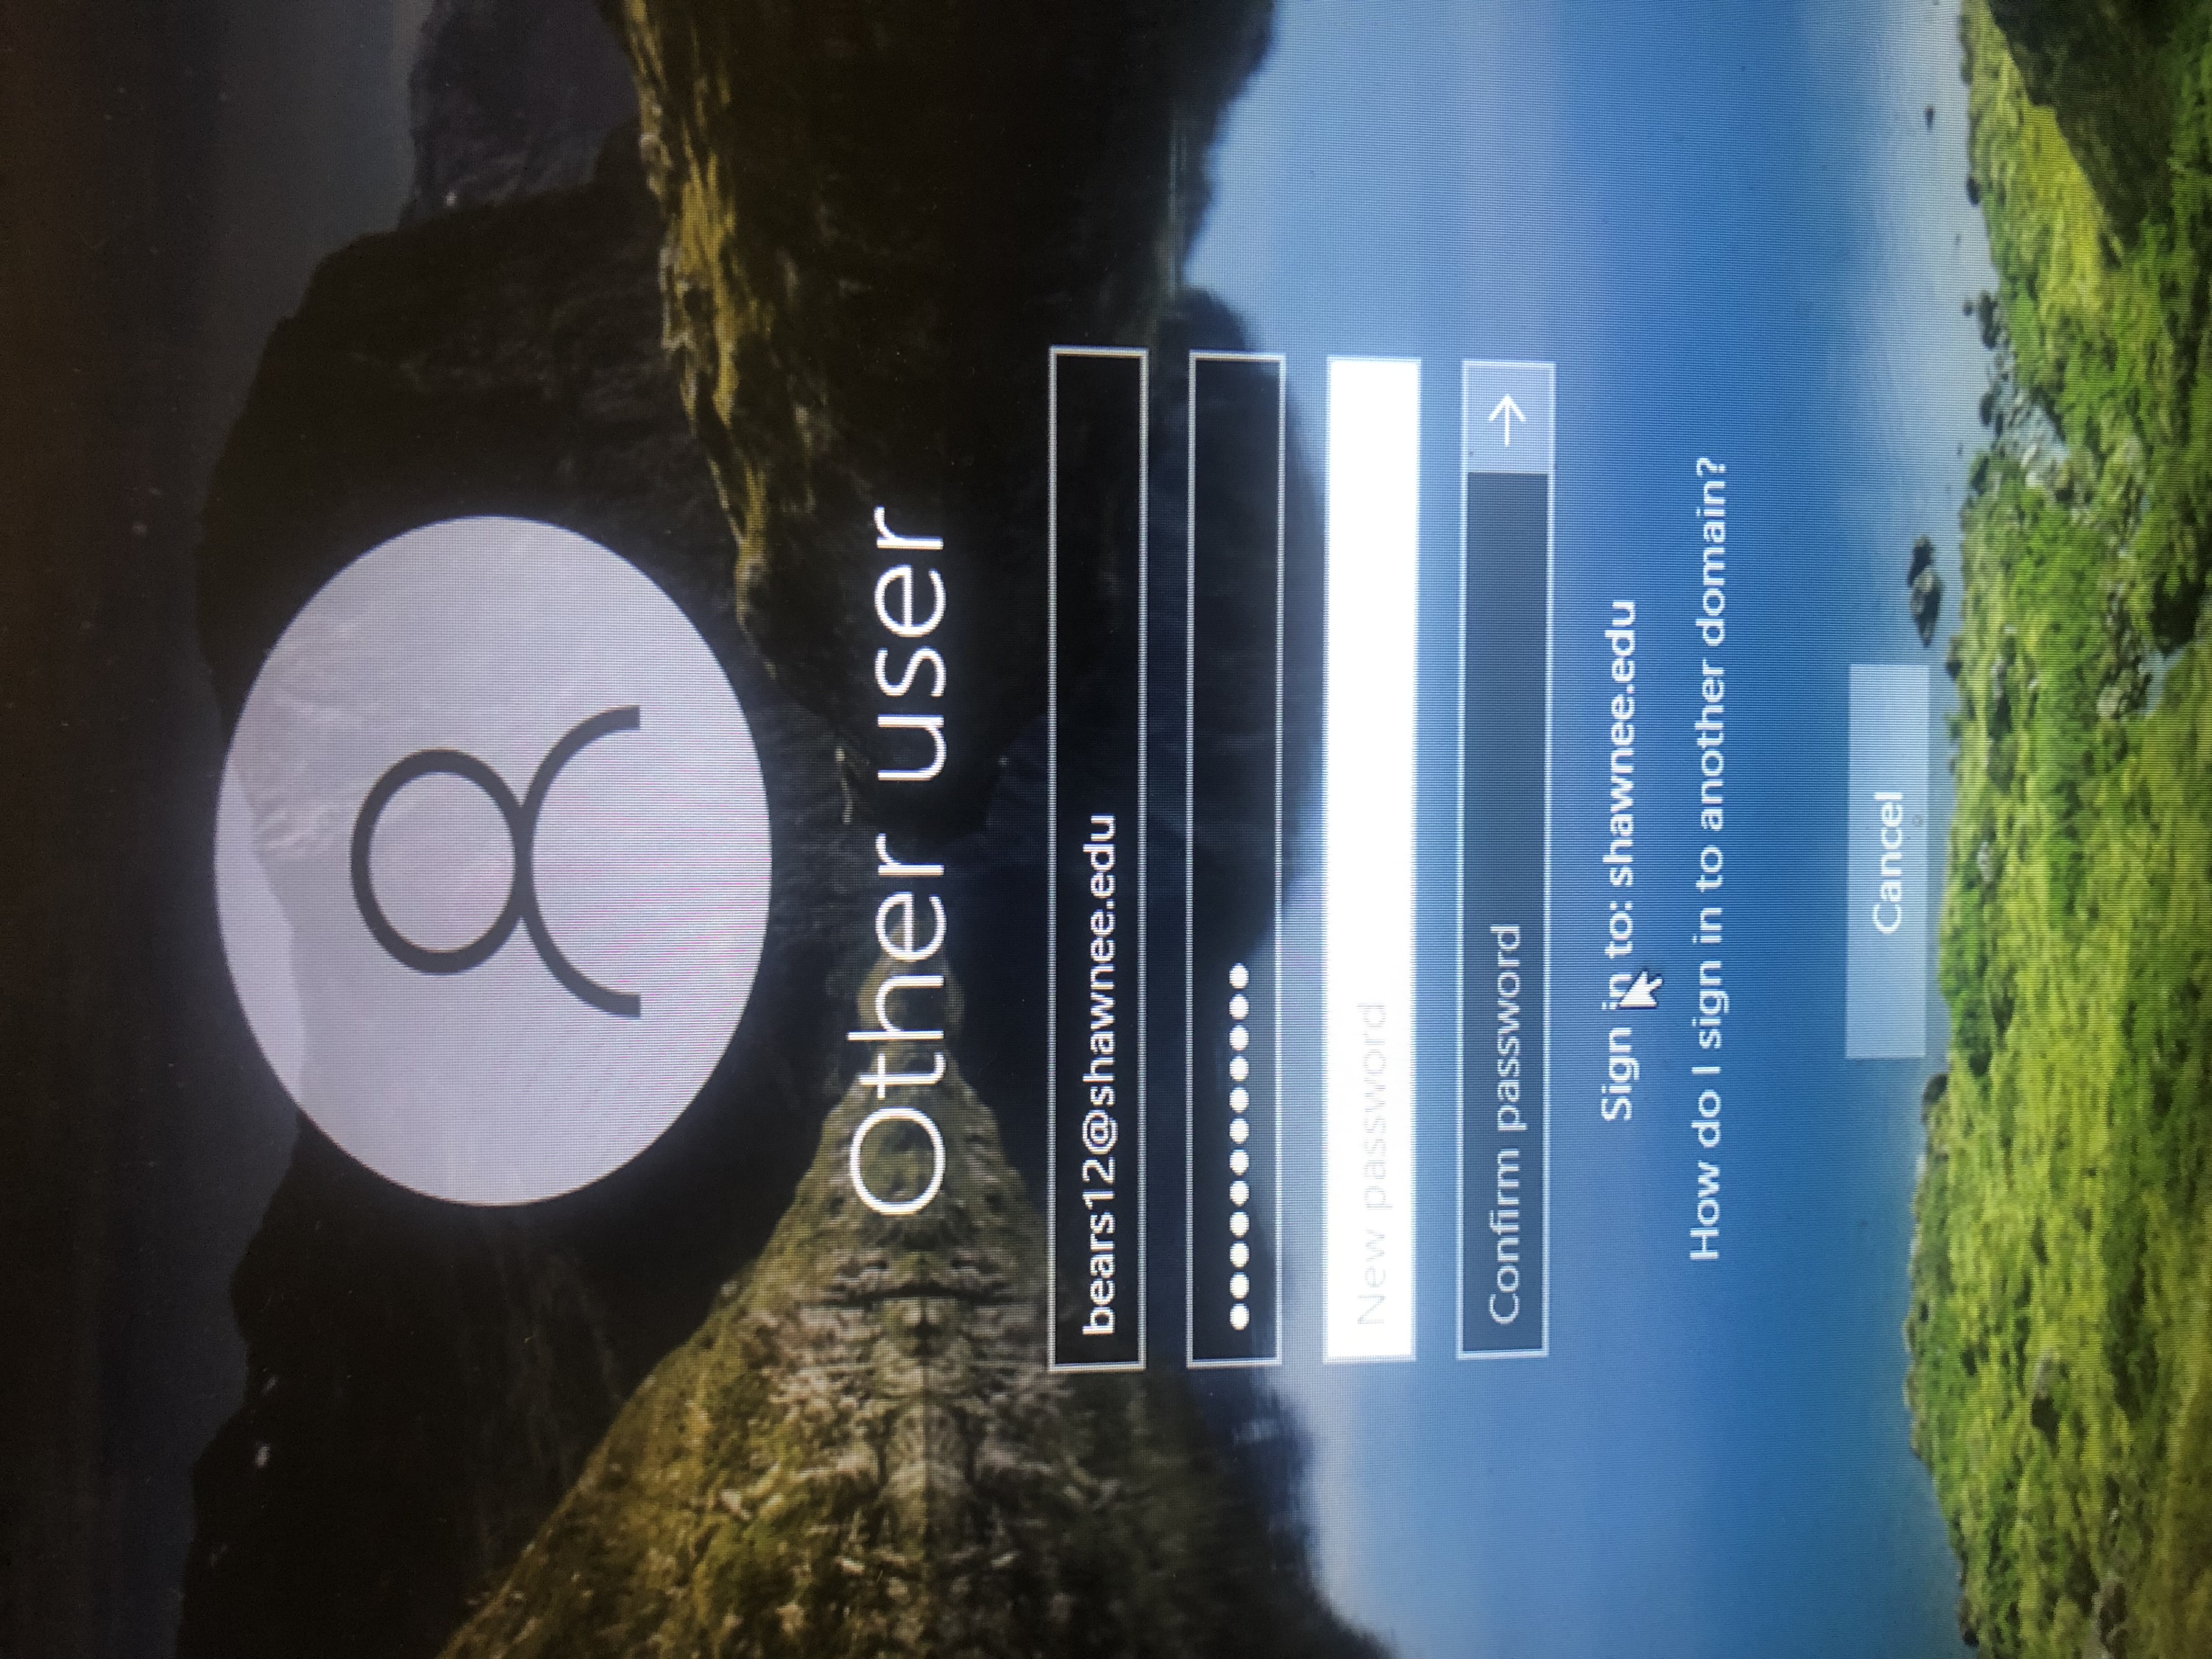
Click the RIGHT POINTING ARROW or hit ENTER on your Keyboard. - You will be asked to create a New Password.
A strong password is required. Strong passwords are 8 to 24 characters and must combine uppercase and lowercase letters, numbers, and symbols. They cannot contain your username.
- Once your password has been successfully changed, you will be able to use the resources on that computer or you can use this account to connect your personal devices to the on-campus SHAWNEE Wi-Fi Network.